
Getting started
Create your FeedLog account and workspace, then prepare your feedback portal for customers.
An organization is your workspace on FeedLog. Your boards, feedback, roadmap and
changelog belong to it, and it determines the portal address your users visit.
This page covers creating an account, setting up an organization and preparing a
portal for your users.
This page describes FeedLog Cloud. A self-hosted installation has no signup
step: running the migrations creates the workspace. If you are self-hosting,
start with Self-hosting overview, then continue from
Put the entrance on your site.
Create your account
Go to auth.feedlog.ai/register and sign
in with Google, GitHub, or an email and password. This account becomes the owner
of the organization. For continuity, use a work account that your organization
can retain rather than a personal account or an alias only one person can
access.
Signing in comes first, then the organization form appears on the same page.
FeedLog does not create the organization until you submit this form, so you can
close the page and return later.
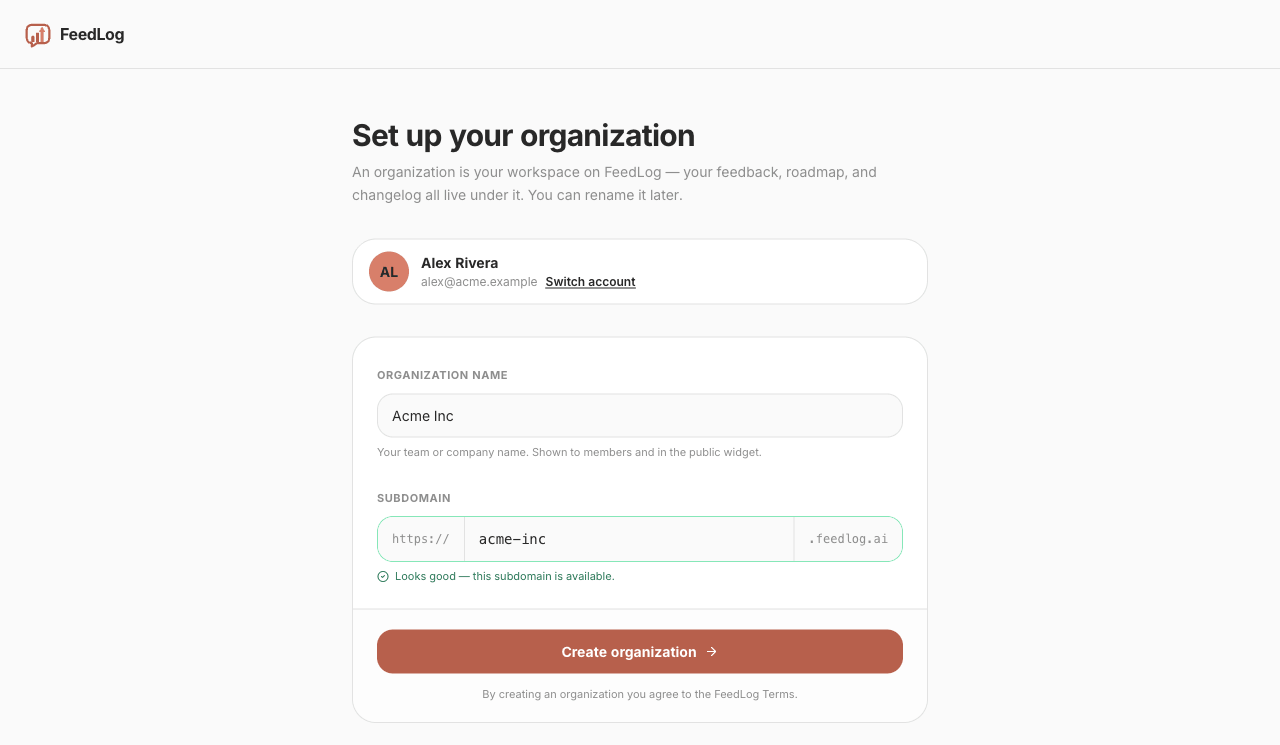
Name it and pick a subdomain
The form has two fields. You can change the organization name later. Choose the
subdomain carefully because changing it affects existing links.
Organization name is your team or company name — Acme Inc, not
Acme Feedback. It appears in the portal header, in invitation emails
("You're invited to join Acme Inc on FeedLog") and in the widget. Change it
whenever you need to; changing the name does not change the portal address or
existing content.
Subdomain determines the portal address, such as
https://acme-inc.feedlog.ai. FeedLog suggests one from the name as you type.
For example, Acme Inc becomes acme-inc. You can replace the suggestion. A
subdomain must be three to 63 characters and contain only lowercase letters,
digits and hyphens, with no hyphen at either end.
FeedLog checks availability as you type and turns the field green when the
subdomain is available. It shows the same unavailable message whether a value
is taken, reserved or malformed. Reserved names include infrastructure words
(api, mail, www), FeedLog product terms (board, roadmap, changelog,
widget) and any value containing feedlog, support, admin or billing.
For example, acme-support is refused. Choose another value if the one you
entered is not available.
Choose the subdomain carefully
You can change it later under Settings → Organization, and FeedLog will
preserve your signed-in session at the new address. But the old one stops working
immediately: it returns 404 with no redirect. Links, bookmarks and entry points
in your product that use the old address must be updated.
If you need an address under a domain you control, point your own domain at the
portal instead.
What you get
After you create the organization, FeedLog opens the dashboard with the
following starter content:
- Four boards — Feature Requests, Bug Report, Improvements and Other.
- A welcome post on Other, authored by FeedLog Team. You can delete it after
real feedback arrives. - A changelog entry announcing that the workspace is live.
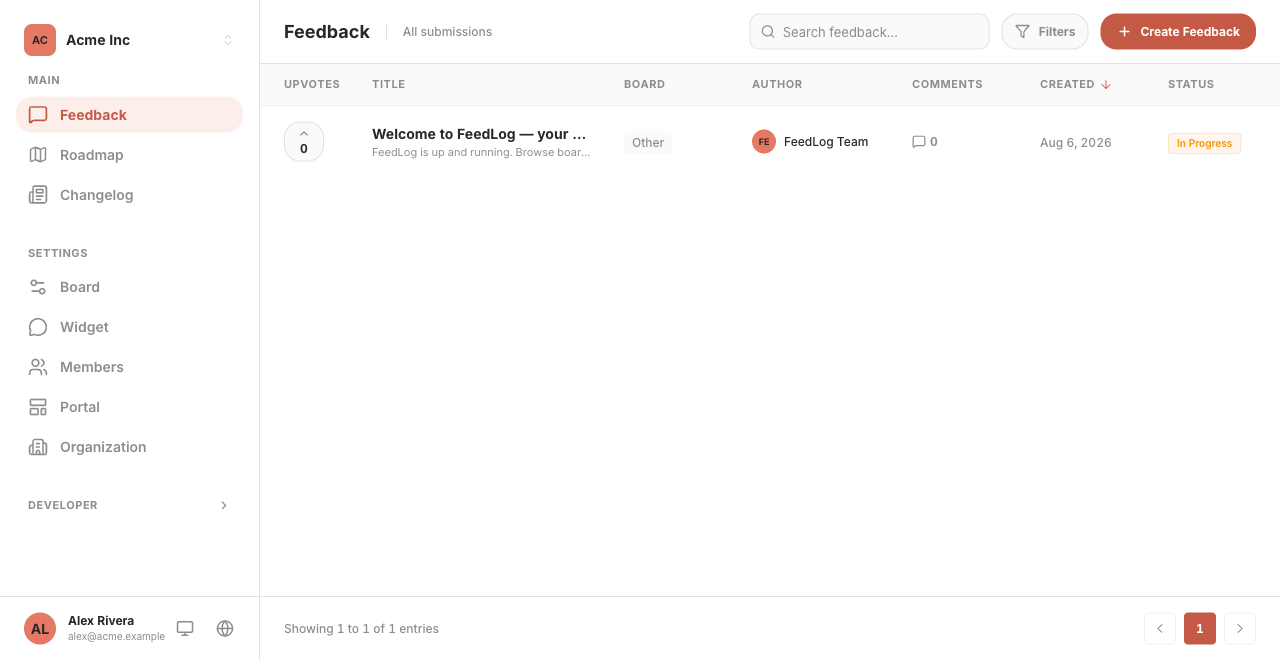
The sidebar has two sections. Main contains Feedback, Roadmap and Changelog
for managing user submissions. Settings contains Board, Widget, Members,
Portal and Organization for managing the workspace configuration.
Look at your portal before you share it
Open https://your-subdomain.feedlog.ai to view the public portal. It shows
boards on the left, posts in the middle and a button for submitting new
feedback.
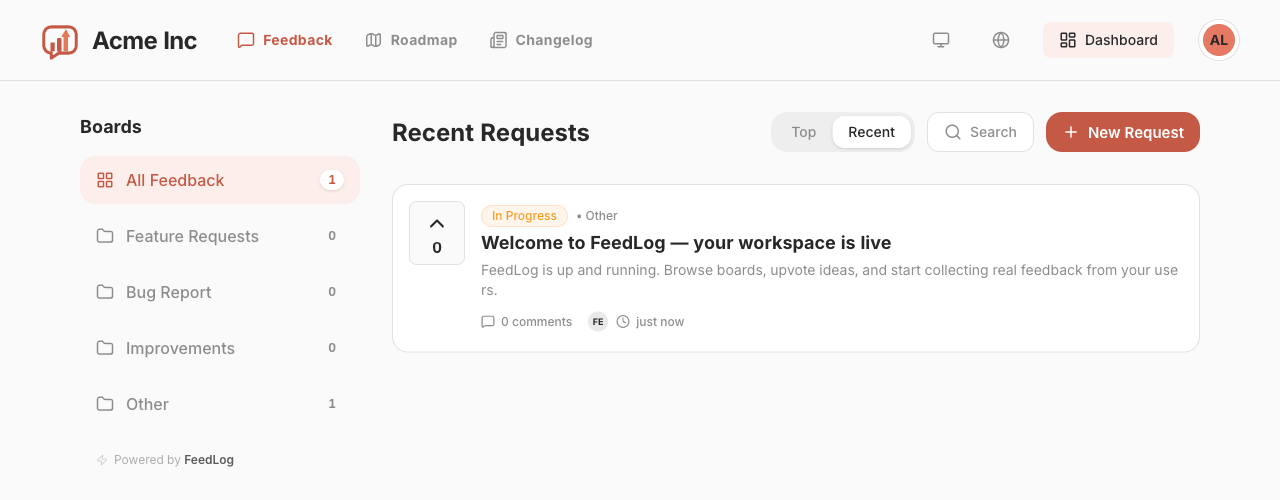
Review these items before sharing the portal:
- Check that the four boards fit your product. Each default board already
has a name and description. If you add a board, describe the feedback it
should contain because the AI uses that description to classify feedback from
the widget. See Creating and managing boards. - Write the welcome message at the top of the portal. Say what you want and
what happens next; the default is a general-purpose template. See Workspace
settings. - Upload your logo and set your brand colour to match the portal to your
product. These options are on the same page as the welcome message.
Put the entrance on your site
Add at least one visible entry point to the portal so users can find it:
A footer link, in the same row as About and Privacy. This is a simple,
low-maintenance option:
html
<a href="https://acme-inc.feedlog.ai" target="_blank" rel="noopener">Feedback</a>A link in your product's help or settings menu. This makes the portal
available while users are working in your product.
The feedback widget. Customers can ask FeedLog Agent questions, read help articles, and submit or supplement feedback through conversation without leaving your product. Follow Agent setup to prepare knowledge and support settings, then install the widget.
When adding an entry point, consider these two details:
Use a label such as "Feedback" or "Feature requests". Use "Support" only if
the destination is monitored for support requests. Billing and account-access
issues may contain information that should not be submitted to a public board.
Open it in a new tab. This keeps the user's current task open in your
product.
If you want a single board rather than the whole portal — a Report a bug
entry that goes straight to Bug Report — add ?b= to the URL. Linking to a
single board covers the format and
why you should link by ID rather than by name.
Invite the rest of the team
Settings → Members sends invitations by email. Owner has full access,
Manager manages feedback, changelogs and the roadmap, and Contributor can view
feedback in the dashboard and join discussions. Team members and
invitations has the full role
breakdown.
You can start collecting feedback without inviting anyone else. Assign someone
to monitor the boards and respond to new feedback so users know it is being
reviewed.
Where to go next
- How feedback works — voting, statuses, comments, and which
emails go out when. - Roadmap and changelog — publishing product
progress based on the feedback you collect. - Introduction to FeedLog Agent — in-product answers, feedback, and conversations.
- Agent setup — knowledge, integration, and launch checks.